Tableau CRM features and Setup guide
What is Tableau CRM?
Many enterprises have leveraged Salesforce out-of-the-box reports and dashboards to understand their data and performance for years. However, data size has been increasing rapidly daily; analyzing the data manually has become a bigger challenge; subsequently, analytics have become more critical than ever before. Learn more about Salesforce CRM implemetation
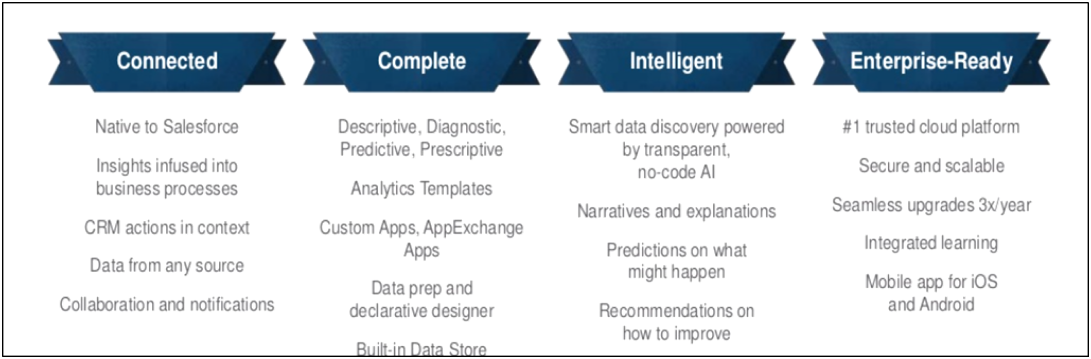
Tableau CRM (Formerly known as Einstein Analytics) was introduced to address this challenge. It's an AI (Artificial intelligence) powered advanced analytics solution which works with any data source. The AI-powered Einstein Discovery, Einstein Analytics apps analyze billions of data combinations and provide predictive insights and prescriptive recommendations to the users.
Tableau CRM provides analytic experiences in sales, service, and marketing to quickly take business decisions and actions. This platform is also optimized for mobile use.
Why Tableau CRM?
The key differences between Tableau CRM and Reports & Dashboards:
| Key Difference | Salesforce Reports & Dashboards | Tableau CRM |
|---|---|---|
| What it is? | Reporting on Salesforce data only to get a snapshot | Analytics discovery platform to explore any data from any source within Salesforce and outside Salesforce |
| Used for | Basic Metrics | Visualize complex KPIs and self-service analytics |
| Experience | Real-time reports and dashboards | Interactive data discovery on any device |
| Data | Salesforce only | Salesforce and data from any other sources |
| Historical | 90-Days Analysis | Year-over-year historical analysis and trends of the data |
Build the analytics app:
- In App launcher (
 ), Select Analytics Studio.
 - In Analytics studio Home Page, click create and select App; the pop-up windows show built-in templates that are ready to use; if you want to create your own, then click Create Blank App and click Continue.

- Enter the name of this App, "My first App."
- Click Create.
Build the Dataset:
- My first App will open in a new tab, and within the same tab, click Create.
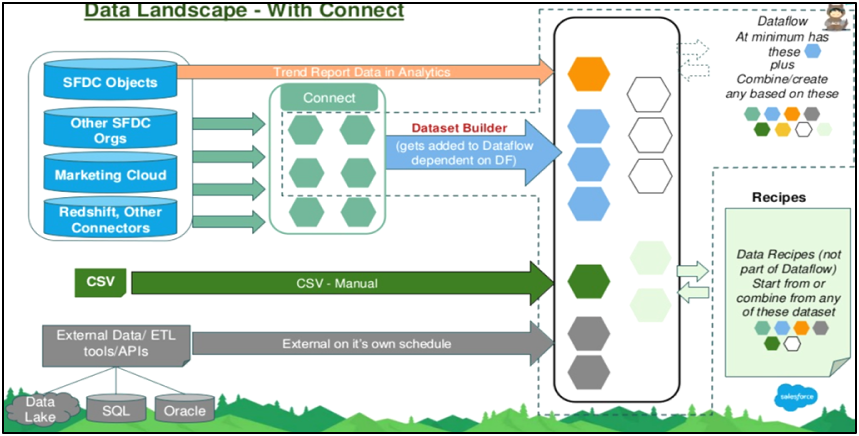
- Select Dataset and choose the data source.
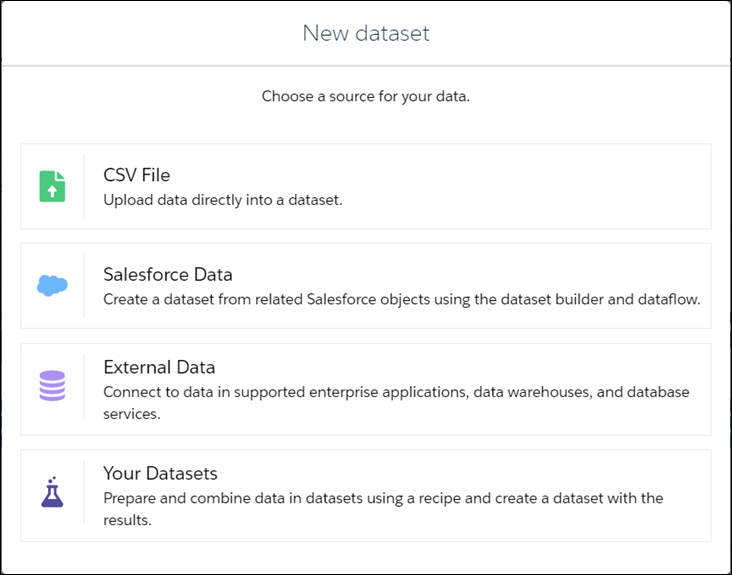
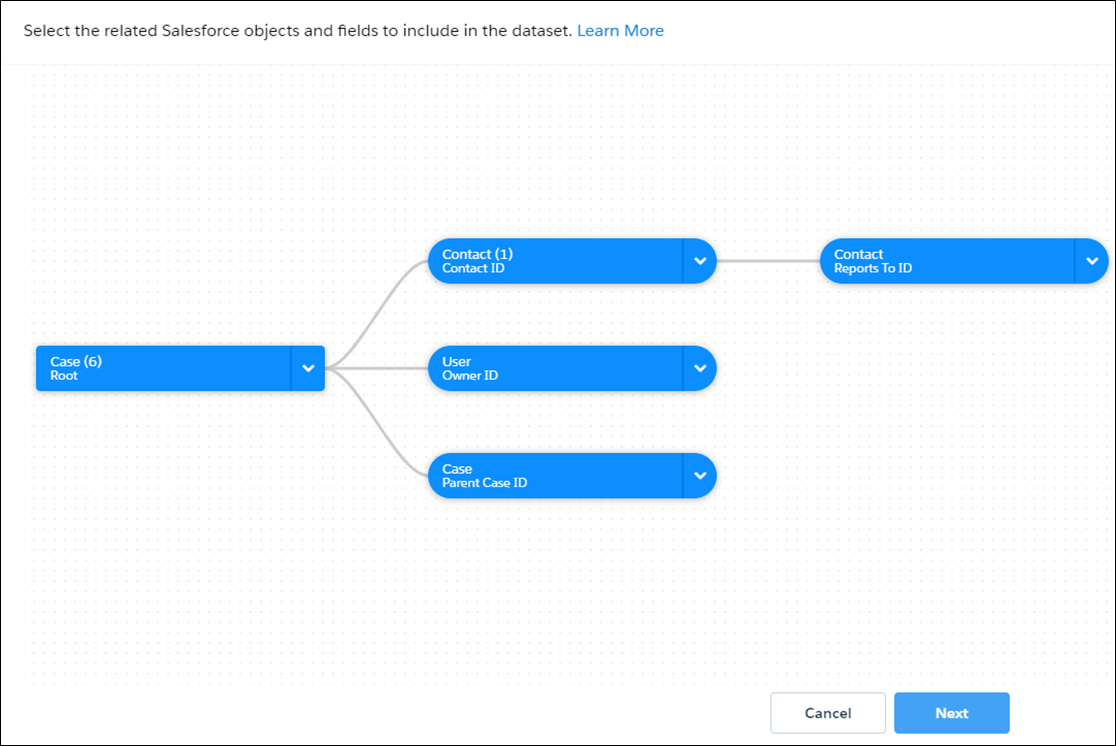
- If you choose Salesforce Data, then in the next window, you can customize Salesforce object selection.
- Salesforce Analytics Query Language (SAQL) is used to access the data in the data set.
- We can change the SAQL according to the requirement if out-of-the-box functionality does not meet the requirement. Click on run query to implement the changes.
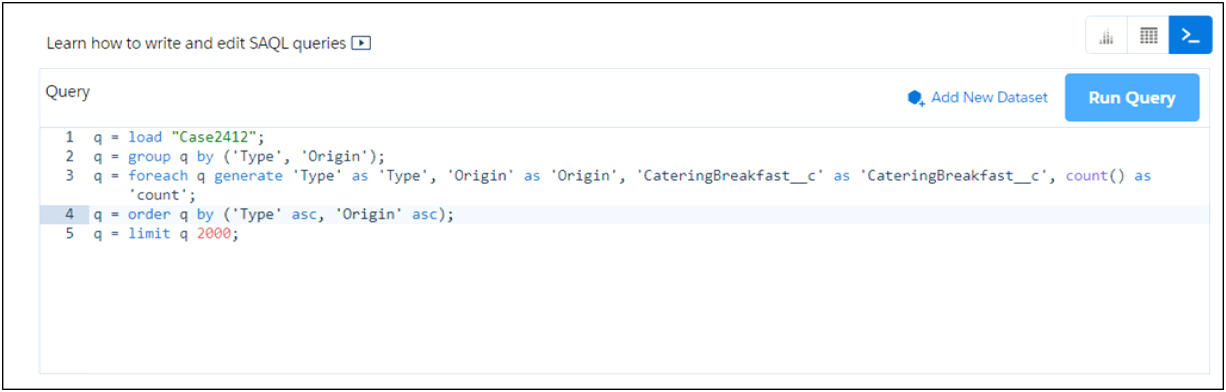
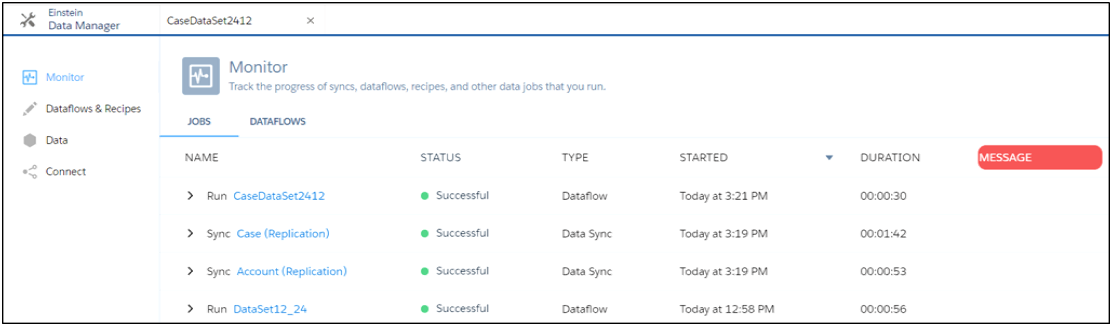
- After preparing the Dataset, the sync status of the Dataset is available in the Data Manager -Monitor tab.
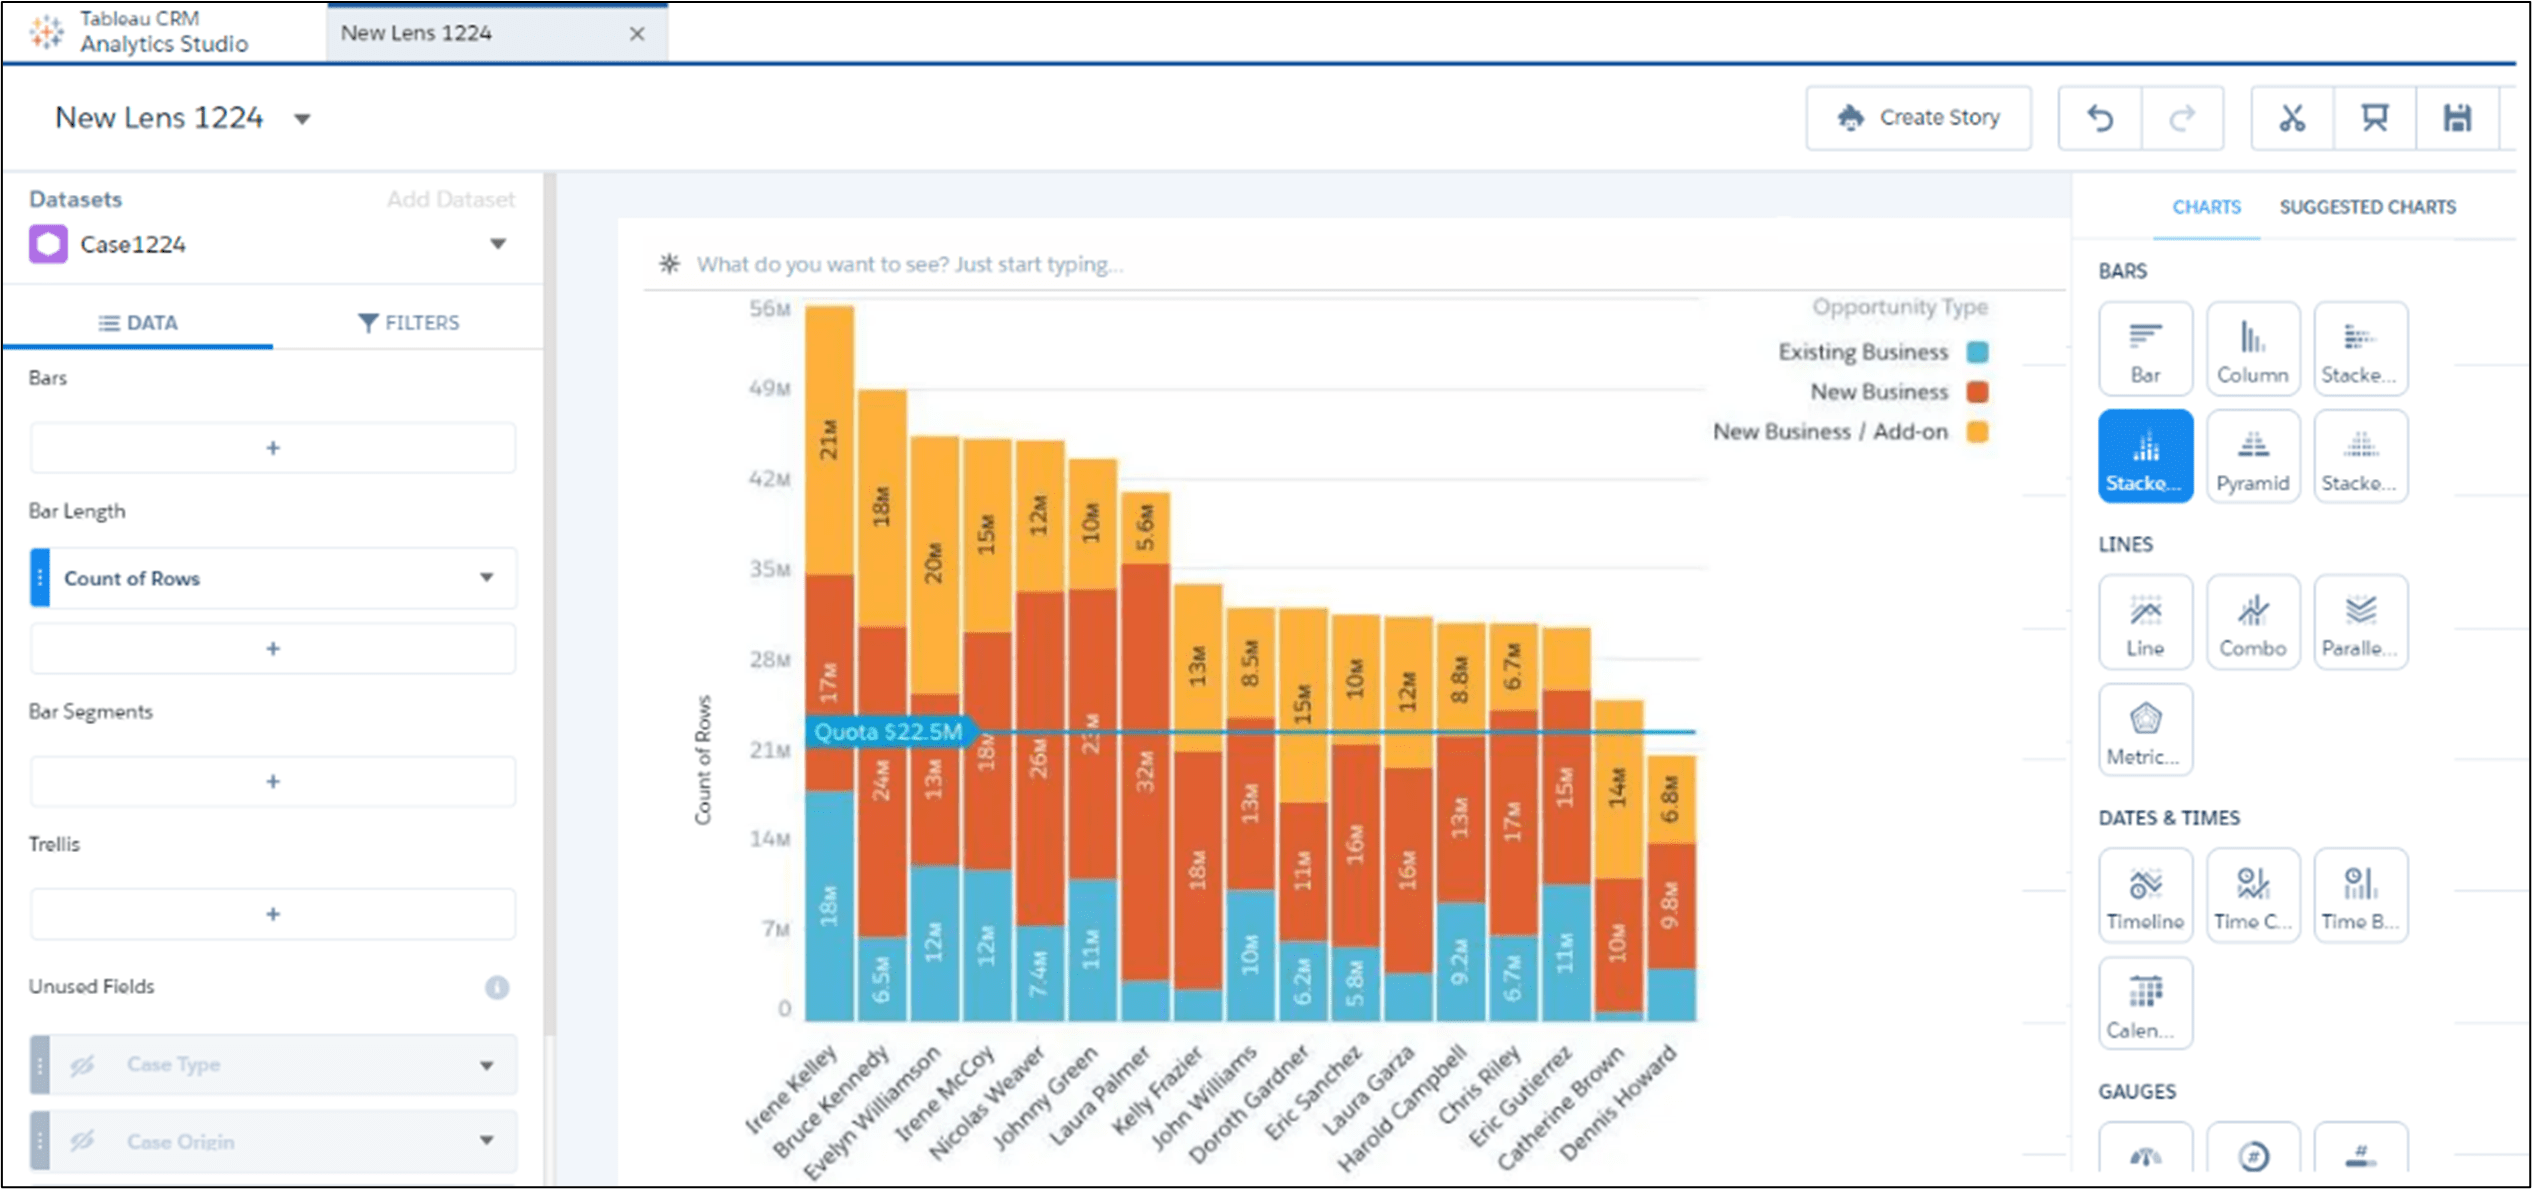
Build the Lens:
- Once the Dataset is ready, click on the Dataset, and it will open a new lens page.
- Under the bars, we can add the appropriate fields to prepare the lens.
- In the chart section, we can select any chart that suits the requirement.
- The changes and modifications on the lens are available in the lens history. We can go back to the previous lens at any step.
- Once the lens is ready, click save and select the App where you want to store it.
Create a Dashboard:
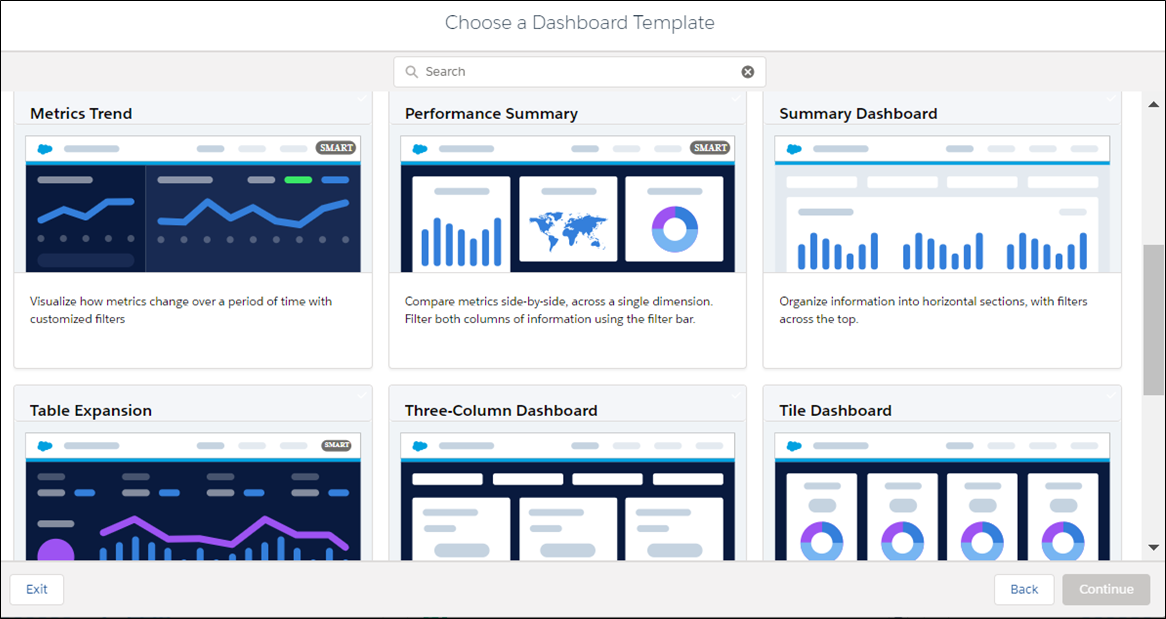
- On the App page, click Create and select Dashboard.
- The pop windows shows two options:
- Blank Dashboard
- Dashboard from Template
- The blank dashboard is used to create a dashboard from scratch, and the dashboard from Template allows you to use predefined templates.
- Click on the Dashboard from Template and choose the appropriate template as per the need.
- You can add any lens to the dashboard, and you can create a lens with different data sets.
- Click Save and select the App to store the newly created dashboard.
- The final App contains all the dashboards, lenses, and datasets.

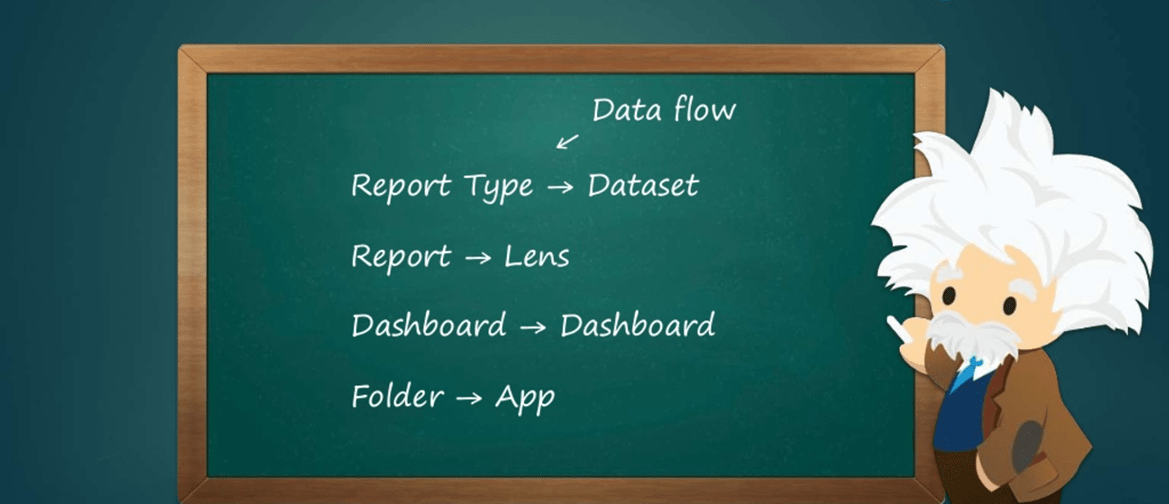
The terminology differences between Salesforce reports-dashboard and Tableau CRM:
How to Setup Tableau CRM in Salesforce:
- Tableau CRM comes with two standard permission sets:
- Einstein Analytics Plus Admin
- Einstein Analytics Plus User

- Before start, assign yourself to Einstein Analytics Plus Admin permission set and for the other users, assign any of the two permission sets based on the user's requirement.
- Then start the setup with the following navigation:
Set up -> Analytics -> Get started -> Enable Einstein Analytics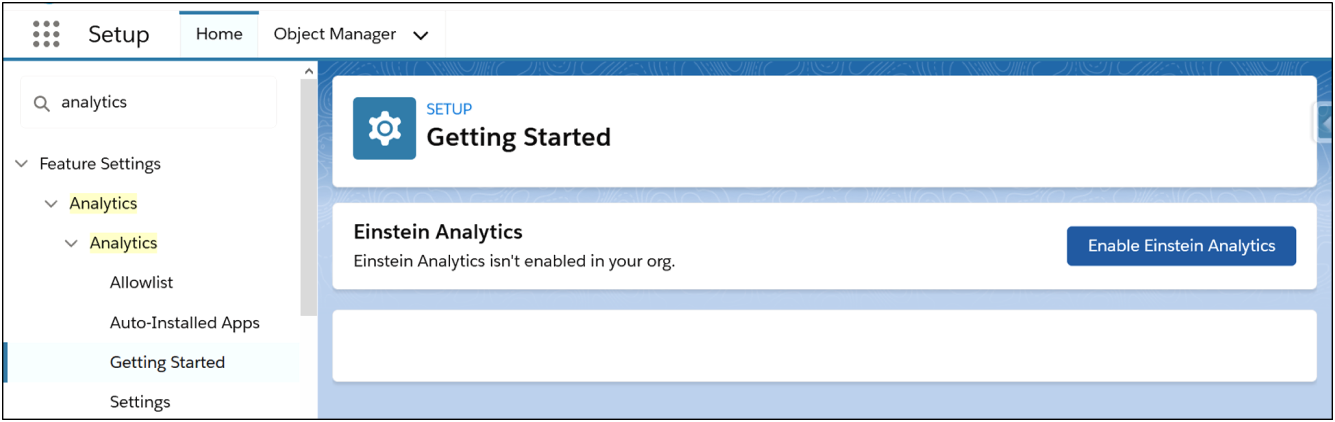
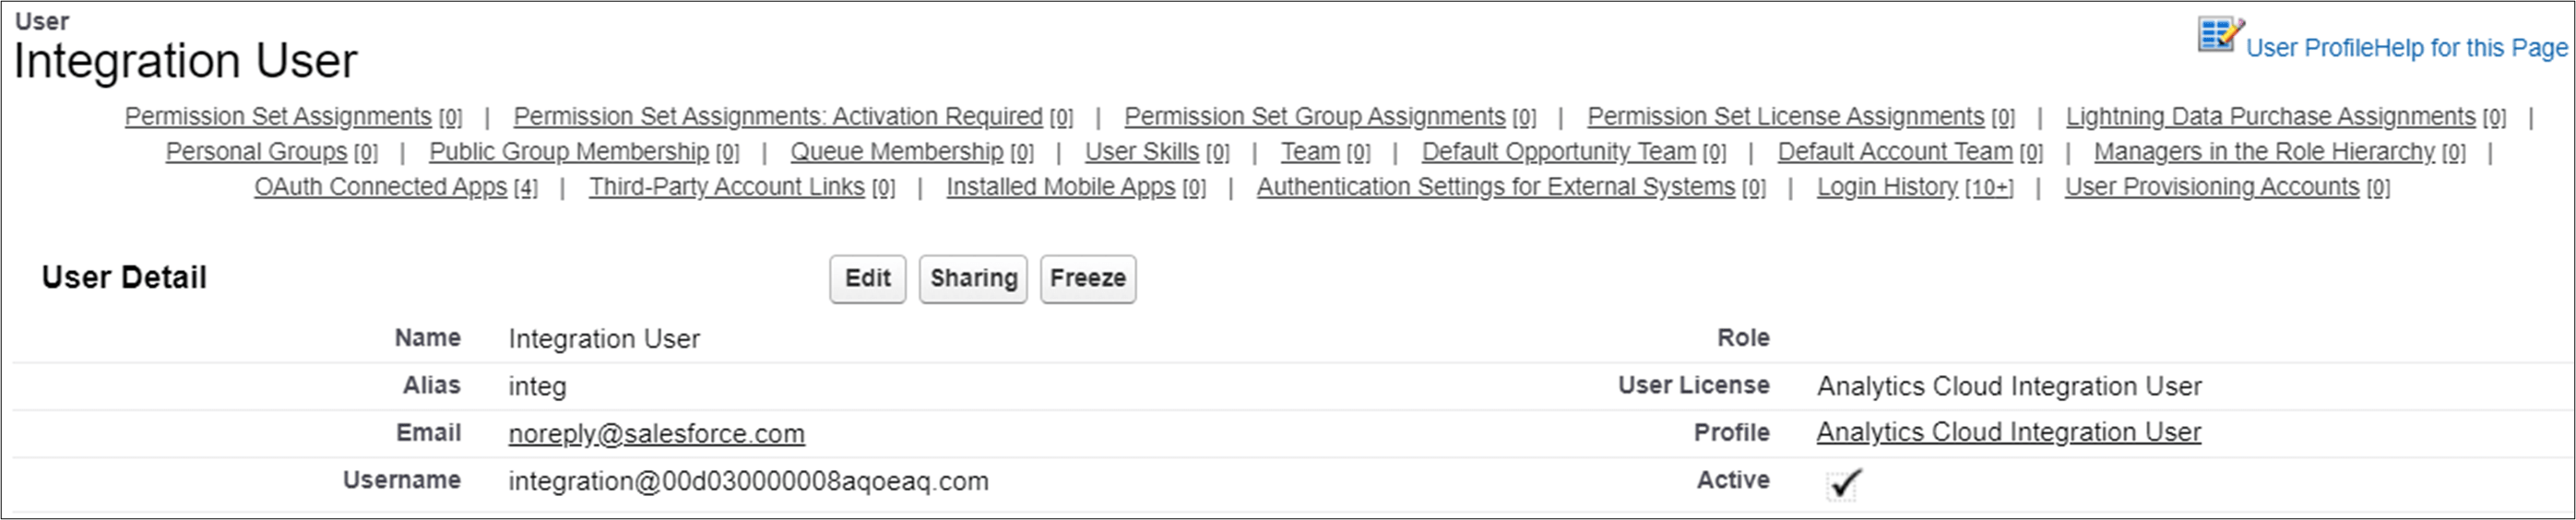
- Once Einstein Analytics is enabled, then it will create two users.
- Integration User:
- Security User:
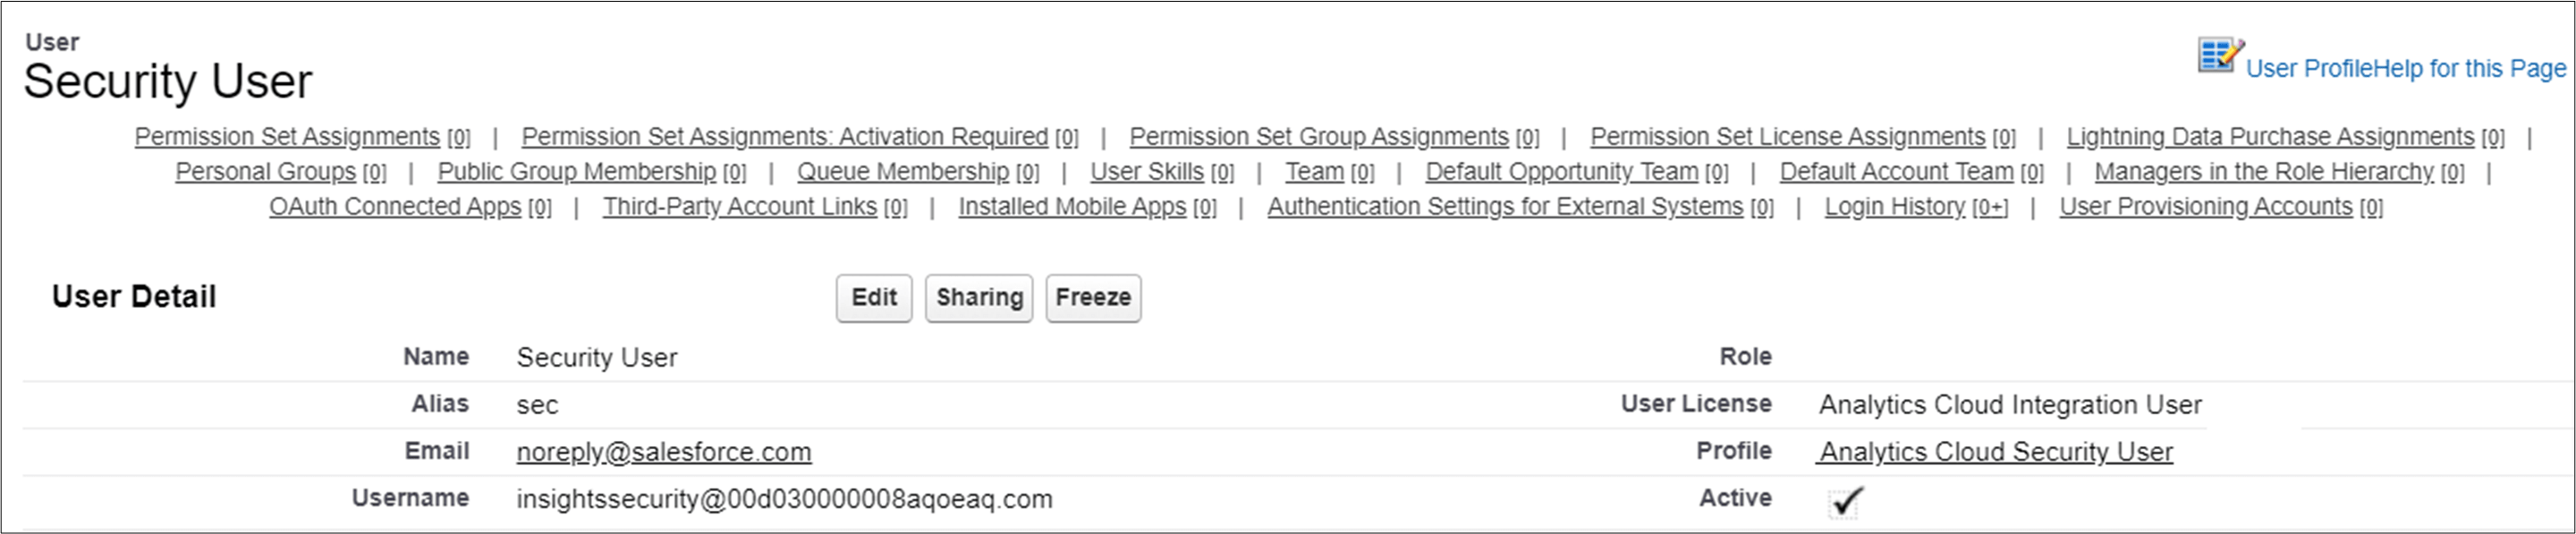
Salesforce data access for Einstein Analytics is based on the permissions of two internal Einstein Analytics users.
- Integration User:
- The newly created users are assigned with standard profiles:
- I. Analytics Cloud Integration User
- II. Analytics Cloud Security User
As per the Salesforce recommendation, these profiles need to be cloned for customized use.
- Enable the Annotations on Dashboard Widgets with the following navigation:
Set up -> Feed Tracking -> Analytics Asset -> Enable Feed Tracking -> Save. Learn more about Salesforce pardot implementation
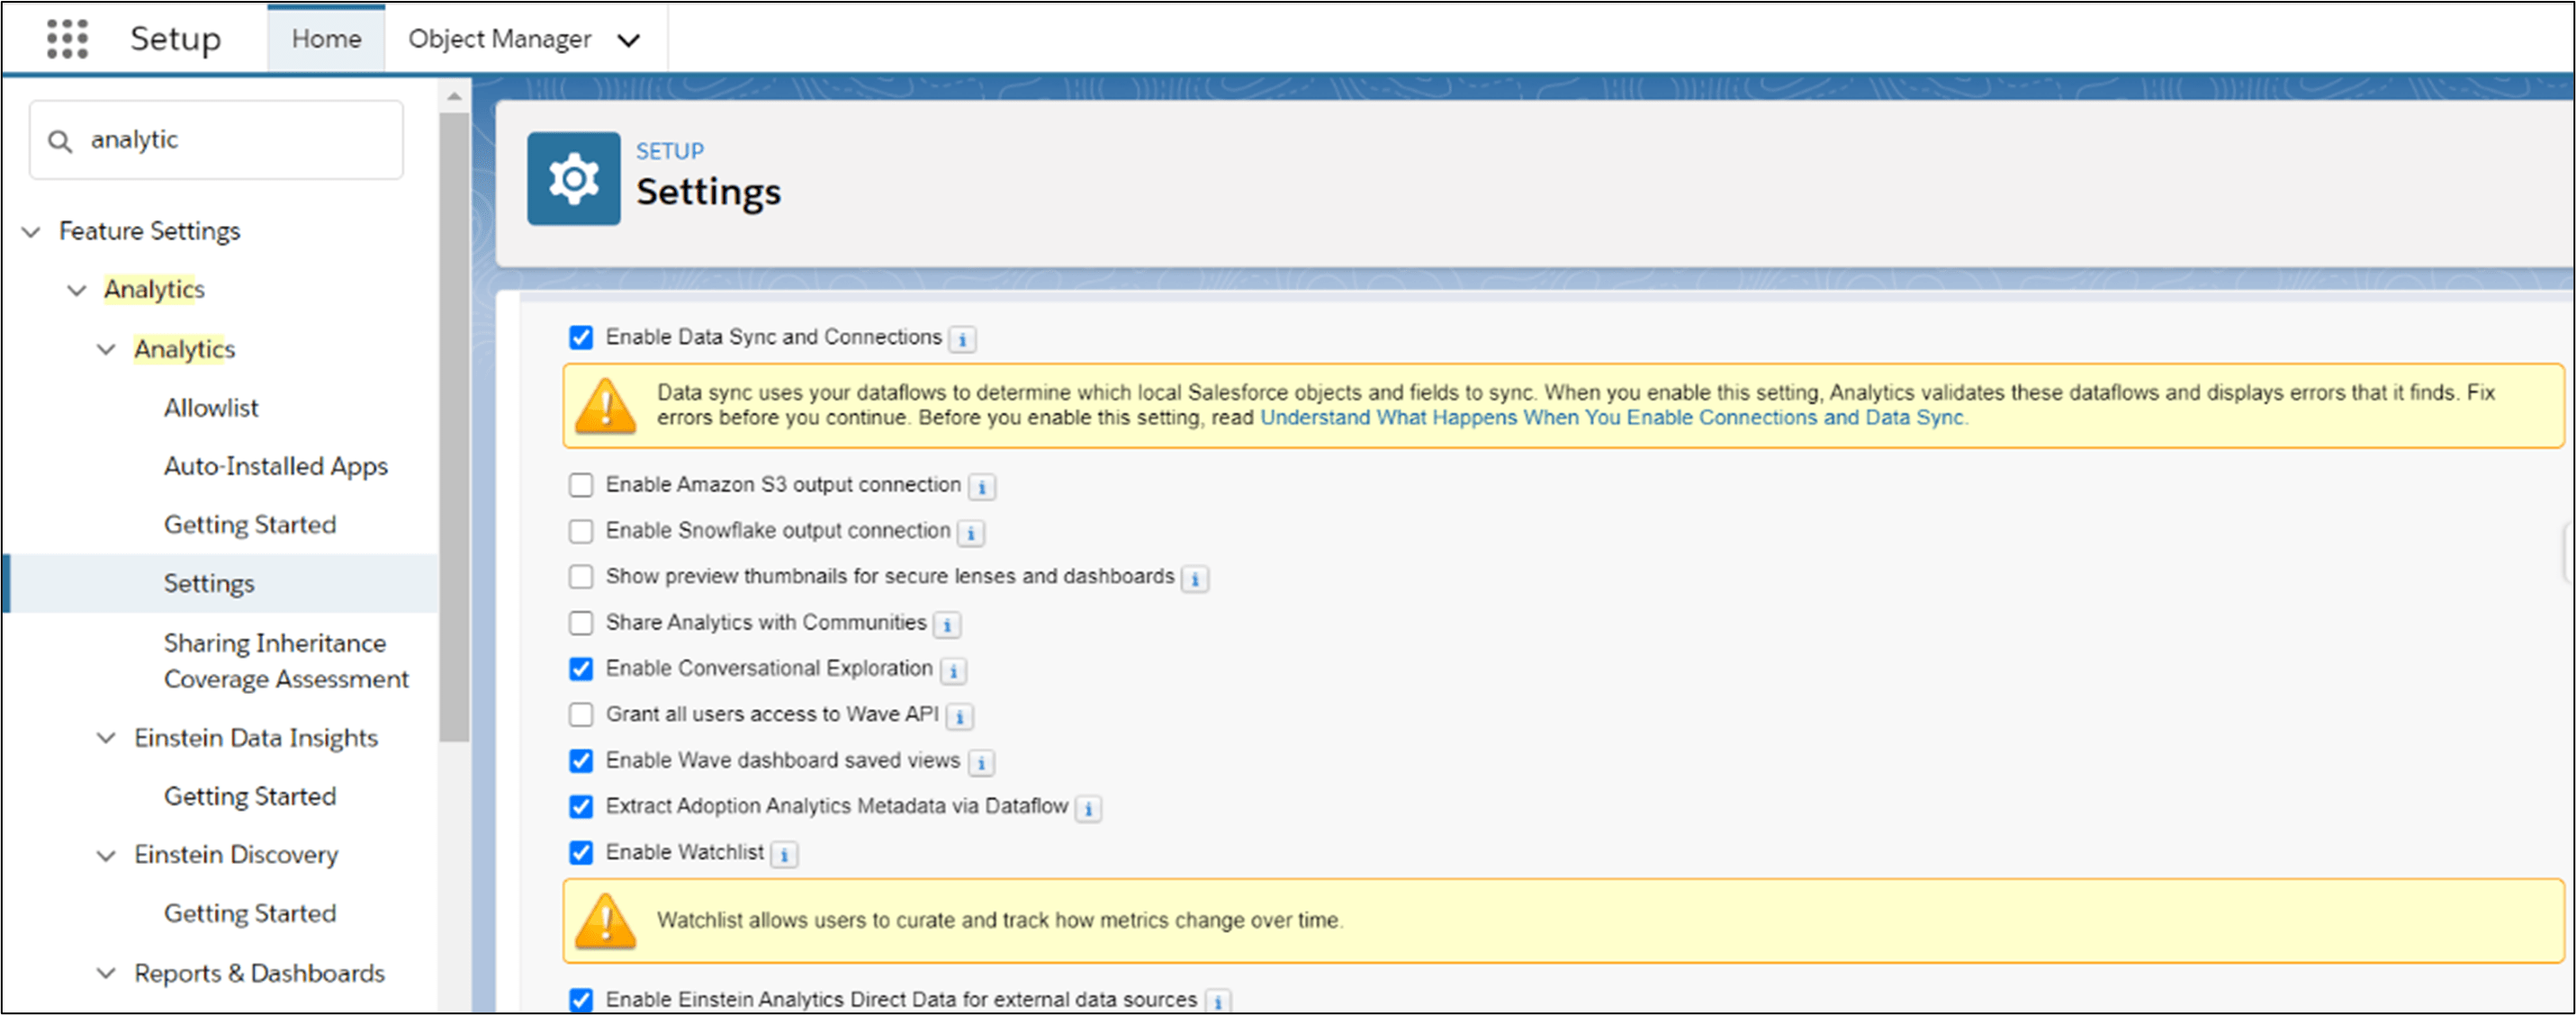
- Use the following navigation steps to change the analytics settings as per the organization's requirements:
Set up -> Analytics -> Analytics -> Settings
Original blog source: https://www.jadeglobal.com/blog/tableau-crm-features-and-setup-guide


Thanks for sharing such an informative Article. I really Enjoyed. It was great reading this article. Keep posting more articles on
ReplyDeleteBig Data Solutions
Advanced Data Analytics Services
Data Modernization Solutions
AI & ML Service Provider
Tableau Crm Features And Setup Guide >>>>> Download Now
ReplyDelete>>>>> Download Full
Tableau Crm Features And Setup Guide >>>>> Download LINK
>>>>> Download Now
Tableau Crm Features And Setup Guide >>>>> Download Full
>>>>> Download LINK hm